Submersible Pump Check Valve: Complete Guide
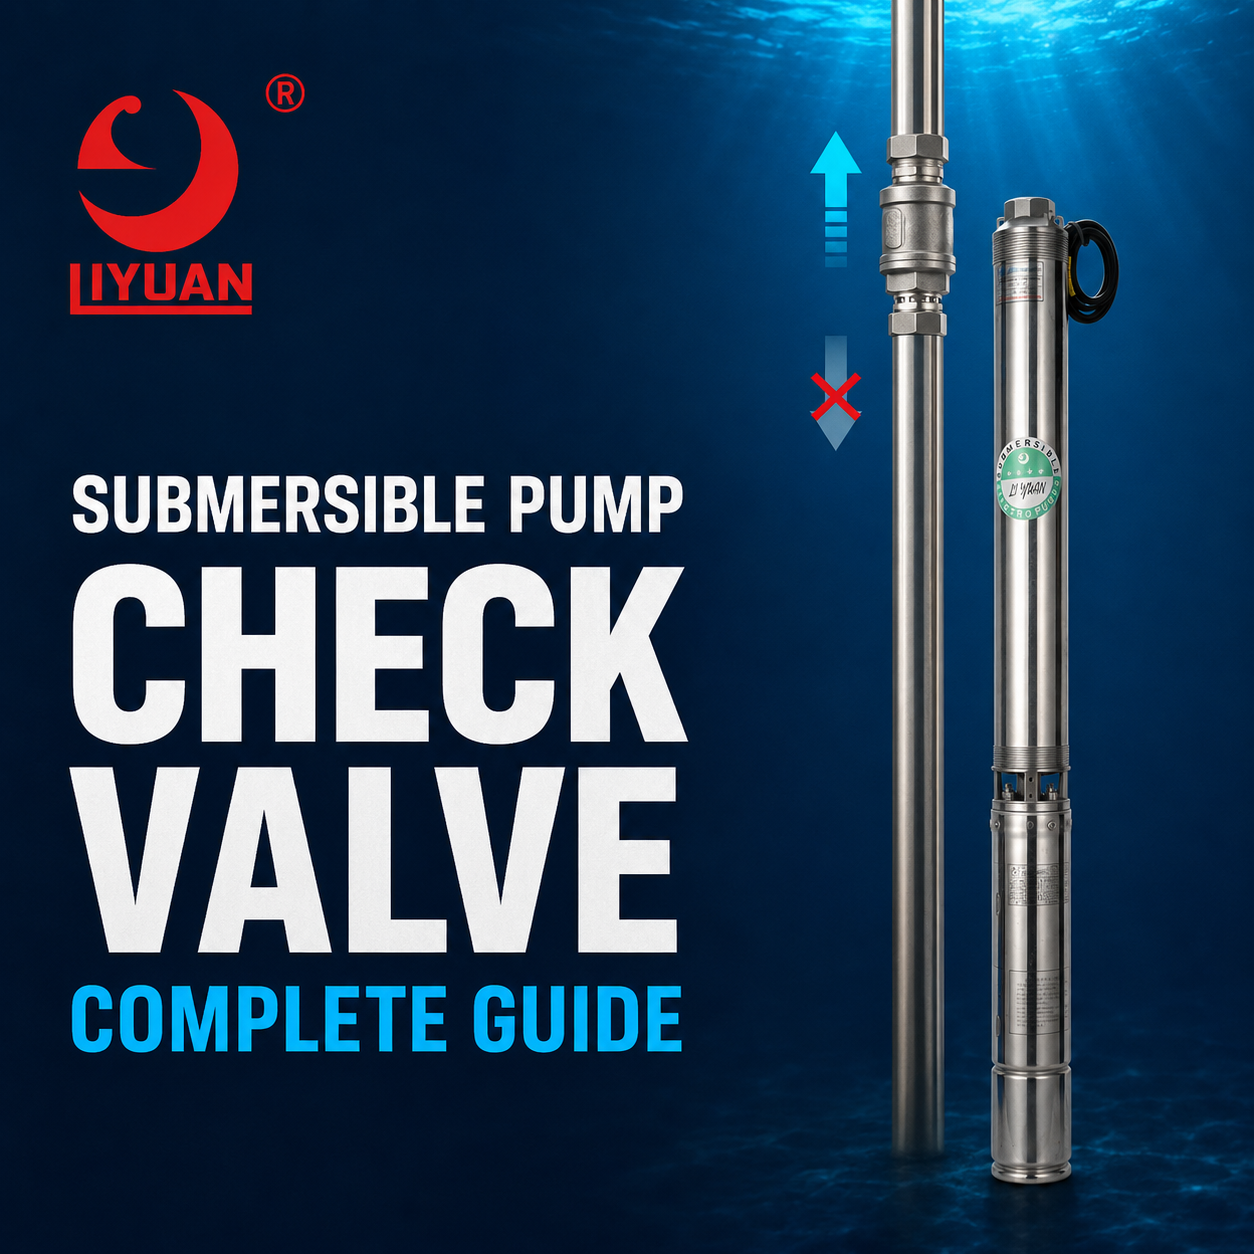
A Submersible Pump Check Valve Allows Water To Flow Upward While Preventing It From Returning To The Well After The Pump Stops. Correct Valve Selection Protects The Pump, Motor, Riser Pipe, Pressure Tank, And Complete Water-Supply System.
An Incorrectly Installed, Leaking, Or Slow-Closing Check Valve Can Cause Reverse Flow, Reverse Pump Rotation, Pressure Loss, Frequent Starting, And Water Hammer.
The Valve Must Match The Pump Flow, Pipe Diameter, Maximum Pressure, Water Quality, Temperature, Installation Depth, And Manufacturer Requirements.
What Is A Submersible Pump Check Valve?
A Submersible Pump Check Valve Is A One-Way Valve Installed On The Pump Discharge Or Inside The Rising main.
It Opens Automatically When The Pump Produces sufficient discharge pressure. When The Pump Stops, Reverse Pressure Closes The Valve.
Its Main Functions Include:
- Preventing Water From Returning To The Well
- Maintaining Water In The Riser Pipe
- Protecting The Pump From Reverse Rotation
- Reducing Pressure Loss
- Supporting Stable Pressure-Tank Operation
- Limiting Hydraulic Shock
- Preventing Repeated Pump Cycling
The Valve Operates Automatically Without An External Power source.
How Does A Check Valve Work?
When The Pump Starts, Water Pressure Pushes The Internal Valve Element Open.
Depending On The Design, This Element May Be:
- A Disc
- A Poppet
- A Spring-Loaded Plate
- A Ball
- A Swinging Flapper
When The Pump Stops, Flow Begins To Slow. The Spring And Reverse Water Pressure Move The Valve Element Back Onto Its seat.
A Correctly Operating Valve Closes Before Significant Reverse Flow develops.
If The Valve Closes Too Slowly, The Water Column Can Reverse Direction And Slam The Valve shut. This Can Create Noise, Pressure Surges, And Mechanical damage.
Why Does A Deep-Well Pump Need A Check Valve?
A Deep-Well System May Contain A Long And Heavy Column Of Water Above The pump.
Without A Check Valve, This Water Can Flow Back Through The Pump After shutdown.
Reverse Flow Can Cause:
- Reverse Impeller Rotation
- Reverse Motor Rotation
- Pump Bearing Stress
- Thrust-Bearing Damage
- Pressure Loss
- Empty Riser Pipe
- Delayed Water Delivery
- Water Hammer During Restart
- Increased Starting Load
- Excessive Pump Cycling
A Check Valve Holds The Water Column In A Controlled position.
Built-In Pump Check Valve
Many Deep-Well Submersible Pumps Include A Check Valve In The Discharge head.
This Valve Is Designed As Part Of The Pump And Provides Immediate Protection Against backflow.
A Built-In Valve Offers Several Benefits:
- Compact Construction
- Protection Close To The Pump
- Reduced Reverse Flow
- Simplified Installation
- Reduced Risk Of Reverse Rotation
However, The Installer Should Confirm Whether The Selected Pump Actually Includes A Check valve.
Never Assume Every Pump Model Has One.
Explore The Available Submersible Pump Configurations Before Final System design.
External Inline Check Valve
An External Inline Check Valve Can Be Installed In The Riser Pipe Above The pump.
This May Be Required When:
- The Pump Has No Built-In Valve.
- Installation Depth Is Significant.
- The Manufacturer Requires Additional Valves.
- The Water Column Is Very Long.
- The Integrated Valve Cannot Support The Complete Pressure.
- The System Has Special Hydraulic Requirements.
Additional Valves Should Not Be Installed At Random. Incorrect Positioning Can Trap Air Or Create A Partial Vacuum Between valves.
Surface Check Valve
A Check Valve Can Also Be Installed Near The Wellhead Or Pressure tank.
However, A Surface Valve Should Not Automatically Replace A Valve Near The pump.
If A Lower Valve Leaks While A Higher Valve Remains Closed, A Partial Vacuum May Form In The vertical pipe. When The Pump Restarts, Fast-Moving Water Can Strike The Stationary Water Column And Create Severe Water hammer.
The Complete Valve Arrangement Must Be Designed As One hydraulic system.
How Many Check Valves Are Required?
The Correct Number Depends On:
- Pump Installation Depth
- Riser-Pipe Length
- Pump Pressure
- Pipe Pressure Rating
- Valve Pressure Rating
- Water-Hammer Risk
- Pump Manufacturer Requirements
- Local Installation Standards
A Shallow Installation May Need Only The Pump’s Built-In Check valve.
A Deep Installation May Require Additional Inline valves. Some Manufacturer Guides Recommend Additional Check Valves At Defined Vertical Intervals, Such As Approximately Every 200 Feet.
However, This Is Not A Universal Rule. Always Follow The Pump And Valve Manufacturer’s instructions.
Too Few Valves May Leave One Valve Supporting An Excessive Water column. Too Many Valves Can Increase Friction, Maintenance, And Hydraulic complexity.
Where Should A Check Valve Be Installed?
The Primary Check Valve Is Commonly Installed At Or Near The Pump discharge.
Additional Valves May Be Installed In The Riser Pipe According To Manufacturer recommendations.
Installation Position Should Consider:
- Dynamic Water Level
- Static Water Level
- Pump Setting Depth
- Total Pipe Length
- Maximum Pressure
- Accessibility
- Well Diameter
- Pipe Couplings
- Cable Position
- Water-Hammer Risk
A Valve Installed Too Far Above The Water Level Can contribute to vacuum formation if the lower piping drains.
Grundfos Explains In Its Submersible Pump Water-Hammer Guide That A Leaking Lower Non-Return Valve Combined With A Tight Upper Valve Can Create A Partial Vacuum And A Damaging Pressure surge.
Check Valve Installation Direction
Every Check Valve Has A Required Flow direction.
An Arrow On The Valve Body Usually Shows The Correct direction. For A Vertical Deep-Well Discharge Pipe, The Arrow Should Point Upward Toward The surface.
Installing The Valve Backward Can Cause:
- No Water Delivery
- Rapid Pressure Increase At The Pump
- Motor Overload
- Pump Heating
- Pipe Or Valve Damage
- Repeated Protection Trips
Check The Arrow Before Lowering The Pump Into The well.
Main Types Of Check Valves
Different Check-Valve Designs Provide Different Closing Speeds, Flow Resistance, And solids-handling ability.
Spring-Loaded Poppet Valve
A Spring-Loaded Poppet Uses A Central Disc Or Poppet That Moves Along A guide.
Advantages Include:
- Fast Closing
- Reduced Reverse Flow
- Compact Design
- Good Vertical Operation
- Lower Water-Hammer Risk
This Design Is Common In Deep-Well Clean-Water systems.
Spring-Loaded Disc Valve
A Spring Pushes The Disc Toward The Seat.
The Valve Opens When Pump Pressure Exceeds The Spring force. It Closes Quickly As Flow slows.
Correct Spring Strength Is Important. An Excessively Strong Spring Increases head loss.
Swing Check Valve
A Swing Check Valve Uses A Hinged Flapper.
It Usually Creates Low Resistance At Full flow. However, The Flapper May Close Slowly And Slam After Reverse Flow begins.
Some Submersible Pump Guidelines Do Not Recommend Standard Swing Check Valves For Deep-Well Applications Because Of Slamming And water-hammer concerns.
Silent Or No-Slam Check Valve
A Silent Check Valve Uses A Spring-Assisted Closing mechanism.
It Closes Before Significant Reverse Velocity develops. This Can Reduce Noise And Hydraulic shock.
Ball Check Valve
A Ball Moves Onto A Seat To Stop Reverse flow.
Ball Check Valves Are Common In Wastewater And Solids-Handling applications. However, They Are Not Always The Best Choice For High-Pressure Deep-Well clean-water systems.
Check Valve Materials
Valve Material Should Match Water Quality, Pressure, Temperature, And expected service life.
Stainless Steel
Stainless Steel Provides Good Strength And Corrosion resistance.
Common Options Include:
- AISI 304 Stainless Steel
- AISI 316 Stainless Steel
- Duplex Stainless Steel
AISI 316 Can Provide Better Chloride Resistance Than AISI 304 In Certain environments.
Brass
Brass Is Common In Residential Clean-Water systems.
Water Chemistry And Drinking-Water Regulations Should Be checked before selection.
Bronze
Bronze Provides Good Corrosion Resistance And Mechanical strength.
It Is Often Used In Water-Supply And Industrial valve components.
Cast Iron
Cast Iron Can Be Used In Larger Surface Or Industrial valves.
It Usually Requires A Suitable Protective coating.
Engineering Plastic
Thermoplastic Valves Are Lightweight And Corrosion resistant.
However, Their Pressure And Temperature Ratings Must Match The system.
For Corrosive Groundwater, Read The Stainless Steel Deep Well Pump: Complete Guide.
Check Valve Seat And Seal Materials
The Valve Seat Creates The Main sealing surface.
Common Seal Materials Include:
- NBR
- EPDM
- FKM
- PTFE
- Metal-To-Metal Seating
NBR Can Suit Standard Clean-Water applications. EPDM Can Provide Good Water And Temperature resistance. FKM Can Handle Higher Temperatures And Certain chemicals.
No Elastomer Is Suitable For Every liquid. Verify Compatibility With Water Temperature, Chemicals, Oil, And Disinfection products.
How To Size A Check Valve
The Valve Should Match The Actual Pump Operating conditions.
Important Selection Data Includes:
- Pump Flow Rate
- Pipe Diameter
- Maximum Working Pressure
- Pump Shut-Off Head
- Static Water Pressure
- Surge Pressure
- Water Temperature
- Sand Content
- Installation Orientation
- Connection Type
- Material Requirements
Do Not Select A Valve Only By Pipe diameter.
A Valve With The Correct Connection Size Can Still Have An Inadequate Pressure Rating Or Excessive flow resistance.
Check Valve Pressure Rating
The Valve Must Withstand The Highest Possible system pressure.
This Pressure May Include:
- Static Water-Column Pressure
- Pump Discharge Pressure
- Pump Shut-Off Pressure
- Pressure-Tank Pressure
- Water-Hammer Surge
- Test Pressure
- Safety Margin
A High Head Submersible Pump Can Produce Significant Pressure. Therefore, Every Valve, Pipe, Coupling, And fitting must have a suitable rating.
A Low-Pressure Valve In A High-Head System Can Crack, deform, or fail at the connection.
Check Valve Flow Capacity
A Check Valve Creates Hydraulic resistance.
If The Internal Passage Is Too Small, The Valve Can Reduce Flow And Increase Pump energy consumption.
An Undersized Valve Can Cause:
- Excessive Head Loss
- Lower Water Output
- Higher Motor Load
- Noise
- Vibration
- Internal Erosion
- Reduced Valve Life
A High Flow Deep Well Pump Requires A Valve With A Sufficient Flow coefficient and internal passage.
The Valve Should Operate Fully Open Near The Pump’s Normal duty point.
What Is Check Valve Cracking Pressure?
Cracking Pressure Is The Minimum Differential Pressure Required To Begin Opening The valve.
A Spring-Loaded Valve Requires Enough Pump Pressure To Overcome The spring.
If Cracking Pressure Is Too High:
- Starting Head Increases.
- Pump Flow Decreases.
- Energy Consumption Increases.
- Low-Flow Operation May Become Unstable.
If Cracking Pressure Is Too Low:
- The Valve May Close Slowly.
- Reverse Flow May Develop.
- Valve Chatter May Occur.
The Spring Should Match The Pump Flow, Pressure, And installation orientation.
What Is Water Hammer?
Water Hammer Is A Pressure Surge Caused By A Rapid Change In Water velocity.
It Can Occur When:
- A Check Valve Slams Closed.
- A Valve Closes Too Quickly.
- A Pipe Contains A Partial Vacuum.
- A Pump Starts Into An Empty Pipe.
- A Pump Stops Suddenly.
- Flow Direction Reverses.
- A Solenoid Valve Closes Rapidly.
Possible Consequences Include:
- Loud Banging Noise
- Pipe Movement
- Broken Couplings
- Cracked Valves
- Damaged Pump Components
- Pressure-Gauge Failure
- Motor And Thrust-Bearing Stress
- Pipe Bursting
Grundfos Defines Water Hammer As A Pressure Surge Caused By A Rapid Change In Flow Velocity. The Effect Can Be Reduced Through Proper Valve Selection, Controlled Pipe Filling, And Suitable Surge protection.
How A Check Valve Causes Water Hammer
A Valve Can Cause Water Hammer When Water Begins Moving Backward Before The Valve closes.
The Reverse-Moving Water Column Gains velocity. When The Valve Finally Closes, The Water Stops suddenly.
This Rapid Deceleration Produces A Pressure surge.
Risk Increases With:
- Long Vertical Pipes
- High Water Velocity
- Slow-Closing Swing Valves
- Worn Springs
- Heavy Valve Discs
- Incorrect Valve Location
- Leaking Lower Valves
- Fast Pump Shutdown
- Empty Pipe Sections
A Fast-Acting No-Slam Valve Can Reduce Reverse velocity. However, The Complete System Must Still Be hydraulically evaluated.
How To Reduce Water Hammer
Possible Solutions Include:
- Install The Primary Valve Near The Pump.
- Use A Fast-Closing Spring-Loaded Valve.
- Replace Leaking Valves.
- Avoid Excessive Flow Velocity.
- Fill Empty Pipes Slowly.
- Use A Soft Starter Or Controlled VFD Ramp.
- Install A Surge Tank When Required.
- Use A Pressure Tank With Correct Precharge.
- Remove Trapped Air.
- Support The Riser Pipe Correctly.
- Verify Valve Spacing.
- Inspect Pipe Couplings.
A VFD Ramp That Is Too Fast Or Too Slow Can Also Create hydraulic problems. Settings Should Match The Pump And system.
Check Valve And Reverse Pump Rotation
When Water Flows Back Through A Stopped Pump, It Can Rotate The Impellers And motor shaft backward.
If The Motor Starts While Rotating Backward, It Can Experience:
- High Starting Current
- Mechanical Shock
- Coupling Stress
- Shaft Damage
- Bearing Damage
- Delayed Acceleration
- Protection Trips
A Correctly Operating Valve Prevents Significant reverse rotation.
Repeated Reverse Rotation Can Shorten The Life Of The Submersible Motor Thrust Bearing.
Check Valve And Pressure Tank Operation
A Pressure Tank Stores Water And Maintains pressure between pump cycles.
When The Pump Stops, The Check Valve Prevents Stored Water From Returning To The well.
A Leaking Valve Can Cause Pressure To fall even when no household outlet is open.
The Pressure Switch Then Restarts The Pump.
This Repeated Cycling Can Cause:
- Increased Energy Use
- Contactor Wear
- Motor Heating
- Capacitor Failure
- Pressure-Switch Damage
- Shortened Pump Life
Before Replacing The Pressure Tank, Check The Valve, Pipes, Connections, And underground leaks.
Check Valve Performance In Sandy Water
Sand Can Enter The Valve Seat And Prevent Complete closure.
Abrasive Particles Can Also Wear:
- The Valve Disc
- The Seat
- The Guide Stem
- The Spring
- Elastomer Seals
Possible Symptoms Include Backflow, Pressure Loss, Chatter, And repeated pump cycling.
For Sandy Wells:
- Develop The Well Properly.
- Install The Pump Above The Sediment Zone.
- Select Abrasion-Resistant Materials.
- Avoid Small Internal Passages.
- Inspect The Valve Regularly.
- Use A Sand-Resistant Pump Design.
The Sand Resistant Submersible Pump: Complete Guide Explains Additional Protection methods.
Check Valve Performance In Hot Water
Hot Water Can Affect Valve Springs, Plastic Components, And elastomer seats.
A Standard Valve May Soften, deform, or leak above its rated temperature.
A Hot-Water Valve Should Have:
- Suitable Body Material
- Heat-Resistant Seal
- Correct Spring Material
- Adequate Pressure Rating
- Manufacturer Approval
Pressure And Temperature Ratings Must Be considered together.
For High-Temperature Projects, Read The Hot Water Submersible Pump: Complete Selection Guide.
Common Check Valve Problems
Valve Leaks
Sand, Worn Seals, Corrosion, Or A Damaged Seat Can Prevent complete closure.
Valve Sticks Open
Mineral Deposits, Sand, Or A Broken Spring Can Hold The valve open.
Valve Sticks Closed
Corrosion, Incorrect Installation, Or A Jammed Disc Can Block water delivery.
Valve Chatters
Low Flow, Incorrect Spring Strength, Turbulence, Or An Oversized Valve Can Cause repeated opening and closing.
Valve Slams
A Slow-Closing Valve May Allow Reverse Flow Before shutting.
Valve Creates Excessive Head Loss
The Valve May Be Too Small Or Partially blocked.
Spring Breaks
Corrosion, Fatigue, Temperature, Or Repeated Cycling Can Damage The spring.
Seat Wears
Abrasive Water And Frequent Cycling Can Damage The sealing surface.
Signs Of A Failed Check Valve
Common Warning Signs Include:
- Pressure Falls Without Water Use.
- Pump Starts More Frequently.
- Banging Occurs During Starting Or Stopping.
- Water Flows Back Into The Well.
- The Riser Pipe Drains.
- The Pump Rotates Backward.
- Water Delivery Is Delayed.
- Pump Flow Decreases.
- Motor Current Changes.
- The Valve Produces Chattering Noise.
- Pressure Fluctuates.
These Symptoms Can Also Result From Pipe Leaks, Tank Problems, Control Faults, Or pump wear. Test The Complete System Before Replacing The valve.
How To Test A Check Valve
A Qualified Pump Technician Can Use Several methods.
Pressure-Hold Test
Stop The Pump And Monitor System pressure.
A Continuous Pressure Drop May Indicate A Leaking Valve Or Pipe.
Backflow Test
Observe Whether Water Returns Through The riser pipe after shutdown.
Sound Inspection
Listen For Slamming, Chattering, Or Reverse-flow noise.
Pump-Cycle Test
Record Pump Starting Frequency When No Water Is being used.
Valve Removal And Inspection
Inspect The Valve For:
- Sand
- Mineral Scale
- Worn Seat
- Broken Spring
- Corrosion
- Cracked Body
- Damaged Disc
- Restricted Movement
Never Work On A Pressurized Pipeline. Isolate The Power And Relieve System Pressure Before inspection.
How To Install A Check Valve
A Typical Installation Process Includes:
- Confirm The Valve Size And Pressure Rating.
- Check The Flow-Direction Arrow.
- Clean The Valve And Pipe Threads.
- Use The Approved Thread-Sealing Method.
- Avoid Excessive Tightening.
- Keep Sealant Out Of The Flow Passage.
- Install The Valve In The Approved Orientation.
- Support The Riser Pipe.
- Verify Pump And Valve Clearance.
- Pressure-Test The System.
- Check For Water Hammer.
- Record The Valve Model And Installation Depth.
For Complete Pump Installation Guidance, Read How To Install A Submersible Pump.
Check Valve Maintenance
Deep-Well Valves Are Difficult To Access. Therefore, Preventive Selection Is Important.
Recommended Maintenance Includes:
- Monitor Pump Cycling.
- Check Pressure Loss.
- Listen For Water Hammer.
- Inspect Removed Pumps And Valves.
- Clean Sand And Mineral Deposits.
- Replace Damaged Springs.
- Replace Worn Seals.
- Check For Corrosion.
- Confirm Free Valve Movement.
- Test Before Reinstallation.
- Replace Old Valves During Major Pump Service.
The Electric Submersible Pump Maintenance Guide Provides Additional Service recommendations.
Information Required For Valve Selection
Provide The Following Information To The Supplier:
- Pump Model
- Pump Flow Rate
- Pump Head
- Pump Shut-Off Head
- Pipe Diameter
- Riser-Pipe Length
- Installation Depth
- Static Water Level
- Dynamic Water Level
- Maximum Working Pressure
- Water Temperature
- Sand Content
- Water Chemistry
- Valve Installation Position
- Required Connection Type
- Required Materials
- Local Standards
Accurate Project Data Helps Prevent Incorrect Valve sizing.
Why Choose Liyuan Pump?
Liyuan Pump Has Manufactured Deep-Well Submersible Pumps And Motors Since 1992.
Our Product Range Includes 3-Inch To 10-Inch Submersible Pumps, Submersible Motors, Solar Pump Systems, Control Equipment, And Customized Water-Pumping solutions.
Liyuan Pump Can Help Evaluate:
- Built-In Check-Valve Design
- Pump Flow And Head
- Valve Pressure Rating
- Riser-Pipe Diameter
- Installation Depth
- Sand Conditions
- Corrosion Resistance
- Hot-Water Requirements
- Pump And Motor Matching
- Complete Deep-Well System Design
Our Products Serve Residential, Agricultural, Industrial, And Municipal Water-Supply projects.
Frequently Asked Questions
Does A Submersible Pump Need A Check Valve?
Yes. Most Deep-Well Systems Require A Check Valve To Prevent Backflow And Reverse pump rotation. Some Pumps Include A Built-In Valve.
Where Should The First Check Valve Be Installed?
The Primary Valve Is Commonly Installed At Or Near The Pump discharge. Follow The Pump Manufacturer’s Instructions.
Can I Install A Check Valve At The Surface Only?
A Surface Valve Alone May Not Protect The Complete Riser Pipe. It Can Also Contribute To Vacuum Formation In Certain failure conditions.
How Many Check Valves Does A Deep Well Need?
The Number Depends On Installation Depth, Pipe Length, Pressure, And Manufacturer requirements. Deep Installations May Require Additional Valves.
Can Too Many Check Valves Cause Problems?
Yes. Excessive Valves Increase Head Loss, Maintenance, And The Risk Of Trapped Pressure Or vacuum sections.
Can A Check Valve Cause Water Hammer?
Yes. A Slow-Closing, Leaking, Or Incorrectly Positioned Valve Can contribute to water hammer.
Which Check Valve Is Best For A Deep-Well Pump?
A Spring-Loaded, Fast-Closing, Low-Loss Valve Is Commonly Suitable. Final Selection Depends On Flow, Pressure, Water Quality, And manufacturer requirements.
Should The Check Valve Match The Pipe Size?
The Connection Usually Matches The Pipe, But Flow Capacity And Pressure Rating Must Also Be checked.
Why Does My Pump Start When No Water Is Used?
A Leaking Check Valve, Pipe Leak, Pressure-Tank Problem, Or Control Fault May Be causing pressure loss.
Can Sand Damage A Check Valve?
Yes. Sand Can Wear The Seat, Jam The Disc, And Prevent Complete closure.
Can I Remove The Built-In Check Valve?
Do Not Remove It Without Manufacturer Approval And A Complete hydraulic evaluation.
How Often Should A Check Valve Be Replaced?
There Is No Universal Interval. Replace It When Testing Shows Leakage, Wear, Corrosion, Spring Damage, Or unstable operation.
Conclusion
A Submersible Pump Check Valve Prevents Backflow, Maintains Riser-Pipe Pressure, And Protects The Pump From Reverse rotation.
Correct Valve Type, Pressure Rating, Flow Capacity, Installation Position, And Material Selection Are Essential For Reliable operation.
A Fast-Closing Valve Installed According To Manufacturer Requirements Can Reduce Water Hammer, Limit Pump Cycling, And Extend The Service Life Of The Complete Deep-Well Pump system.
Email:Liyuan@liyuan-pump.com
WhatsApp:+86 181-2828-2767